An annoying “safety feature” on the import mini lathes is the flip-down chuck shield with disconnect switch. If you don’t have that shield down, the lathe won’t run.
Of course, that shield doesn’t really do anything for safety and is actually pretty problematic. Not only does it block your view of the work, but (at least in my case) it also interferes with the spinning chuck.
Luckily, it is super easy to disable that disconnect switch. Doing so will let you run the lathe with the shield down, the shield up, and even with the shield completely removed.
I did this on my 7×16″ VEVOR MX-S716G, but the same procedure should work on just about all of the mini lathes that come with a similar chuck shield.
Step #1: Remove the Back Panel
To access the disconnect switch, you’ll need to first remove the back panel.
There are six screws you need to unfasten to get the cover off. A 3mm hex wrench fit mine, but yours may be different.
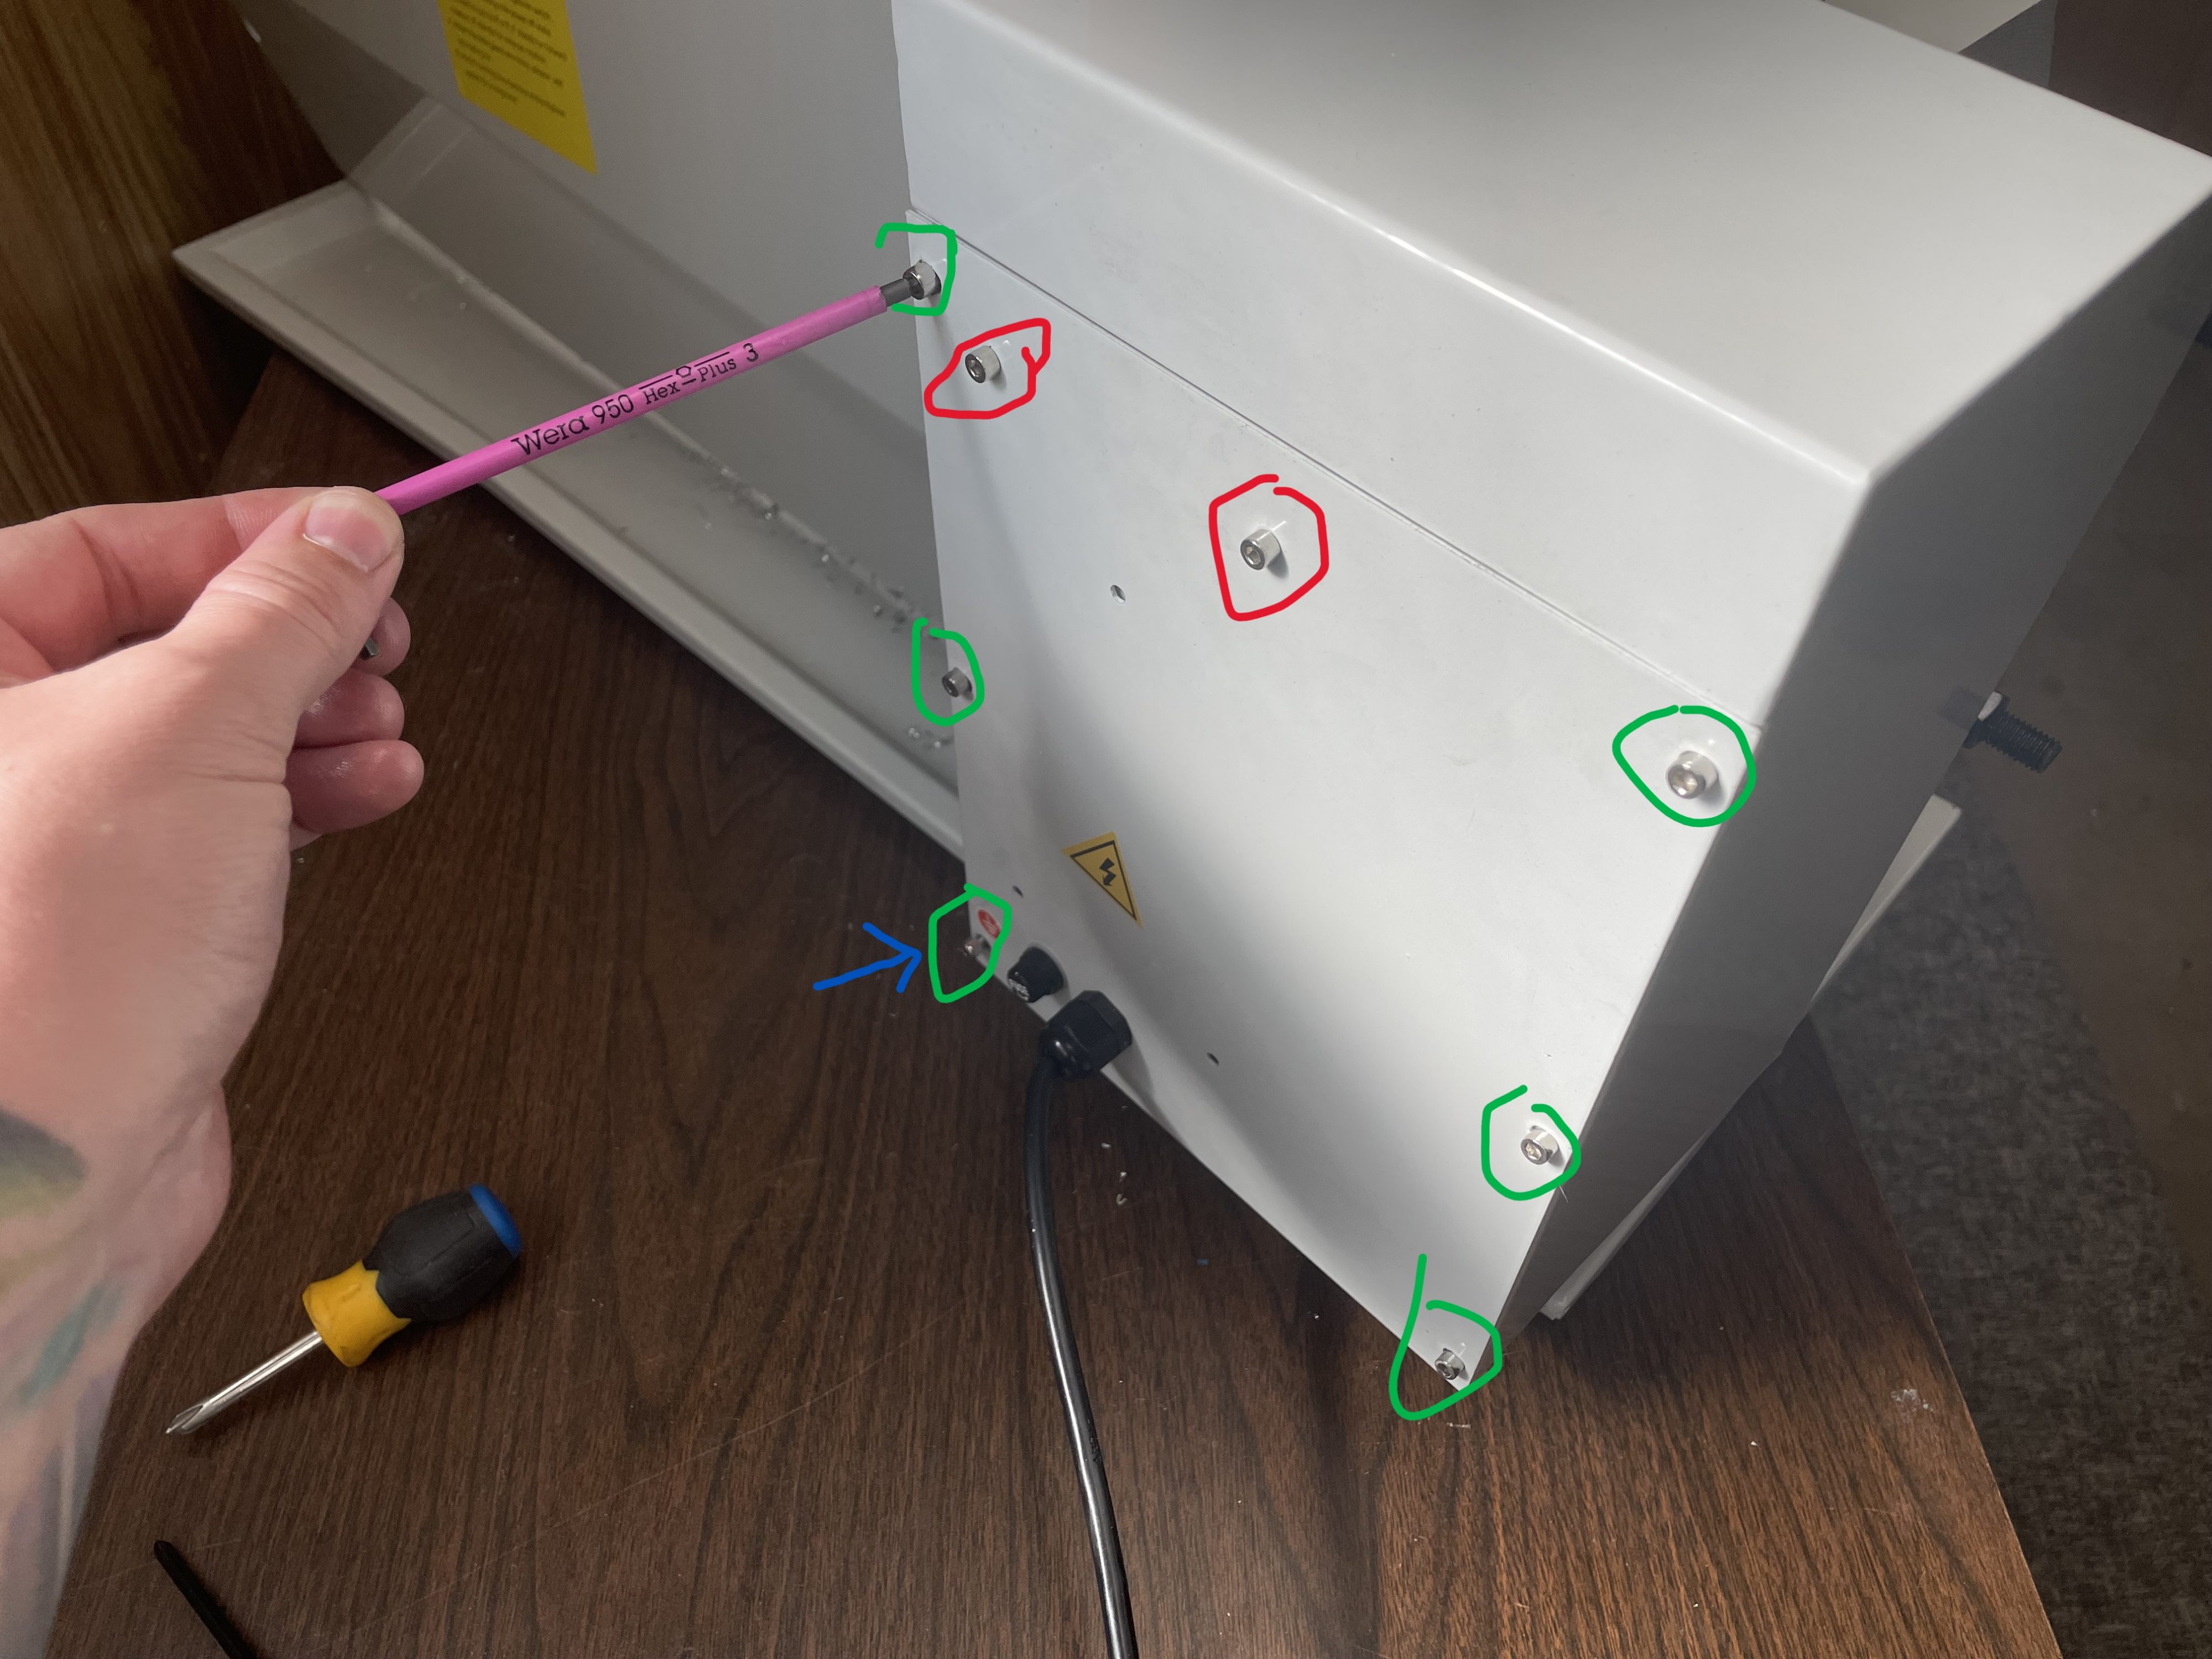
I’ve marked the six screws in green in this picture. The two marked in red hold the control board to that panel and should not be removed—doing so won’t hurt anything, but there isn’t any reason to take them off.
The bottom left screw (marked with blue arrow) holds the grounding wire to the chassis on the inside. Take note of that, because you’ll need to put it back in place when you’re done.
Step #2: Rewire the Disconnect Switch
As it comes from the factory, the switch is wired so that closing the shield completes a circuit between the two wires. So, this mod is very simple: you’re just connecting those two wires together, such that the circuit is always complete. That’s it!
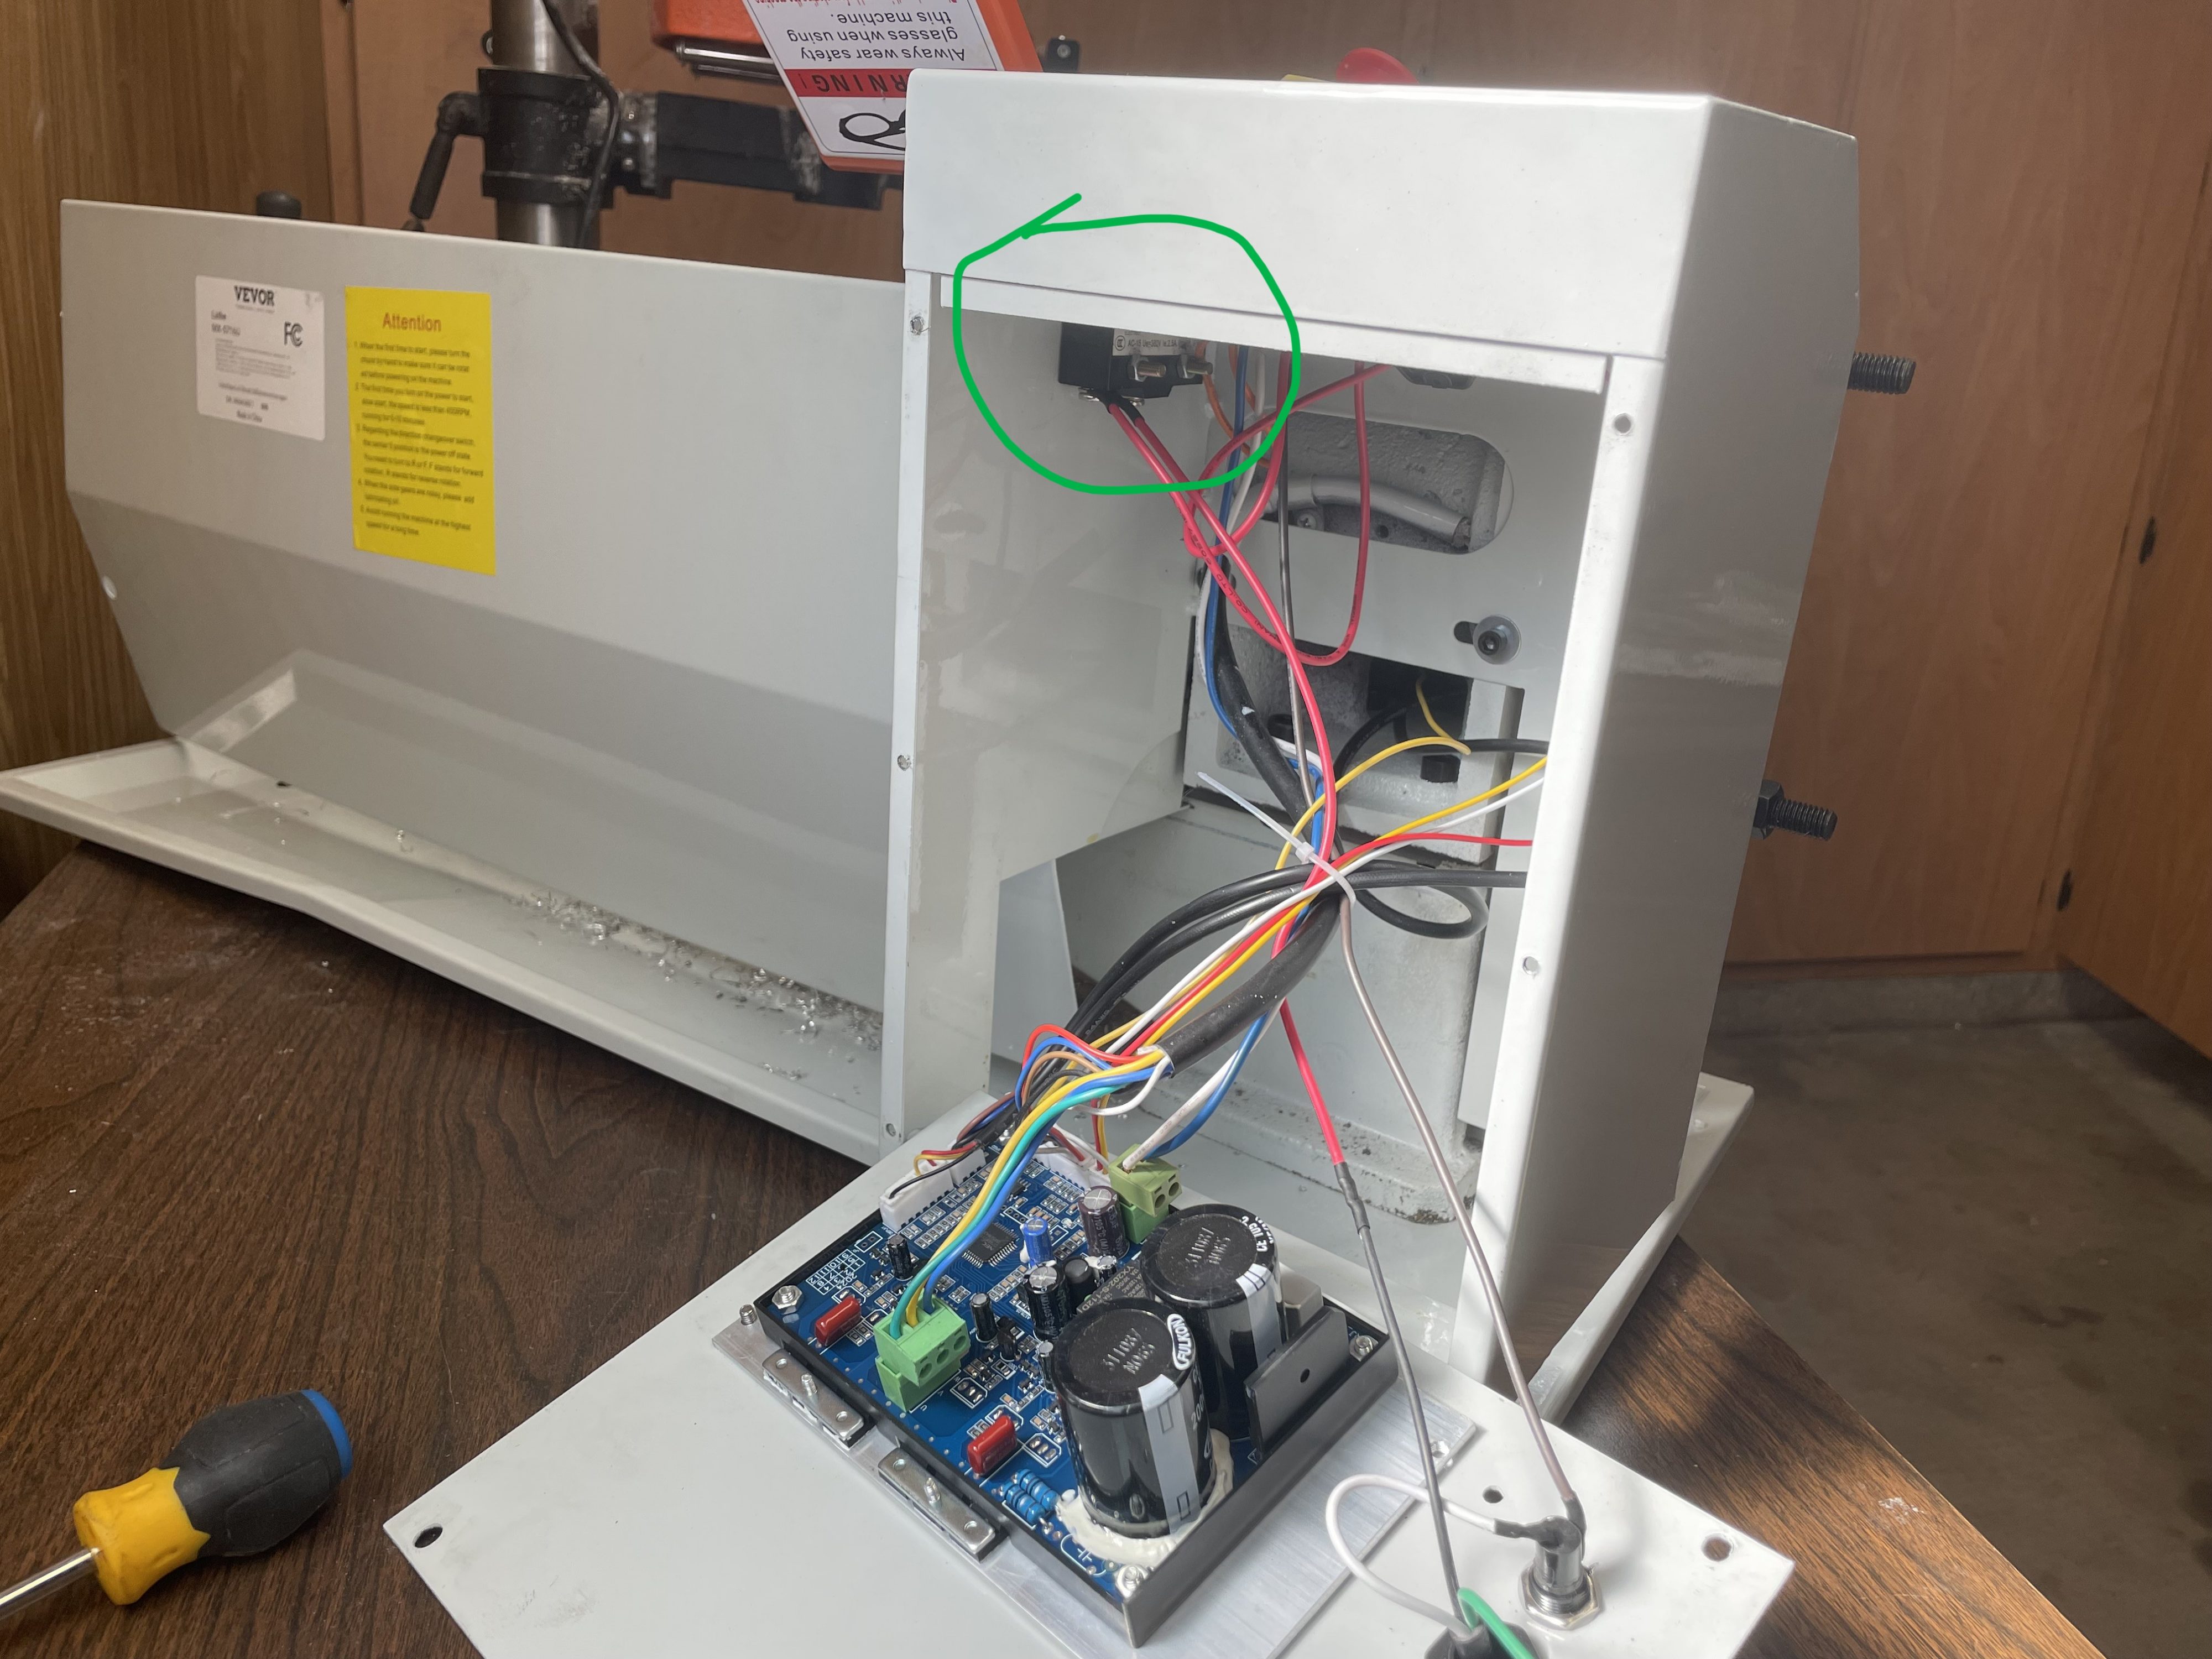
The switch is located at the top of the compartment. There should be two wires going to that switch. In my case, both were red. Screw terminals hold the wires onto the switch.
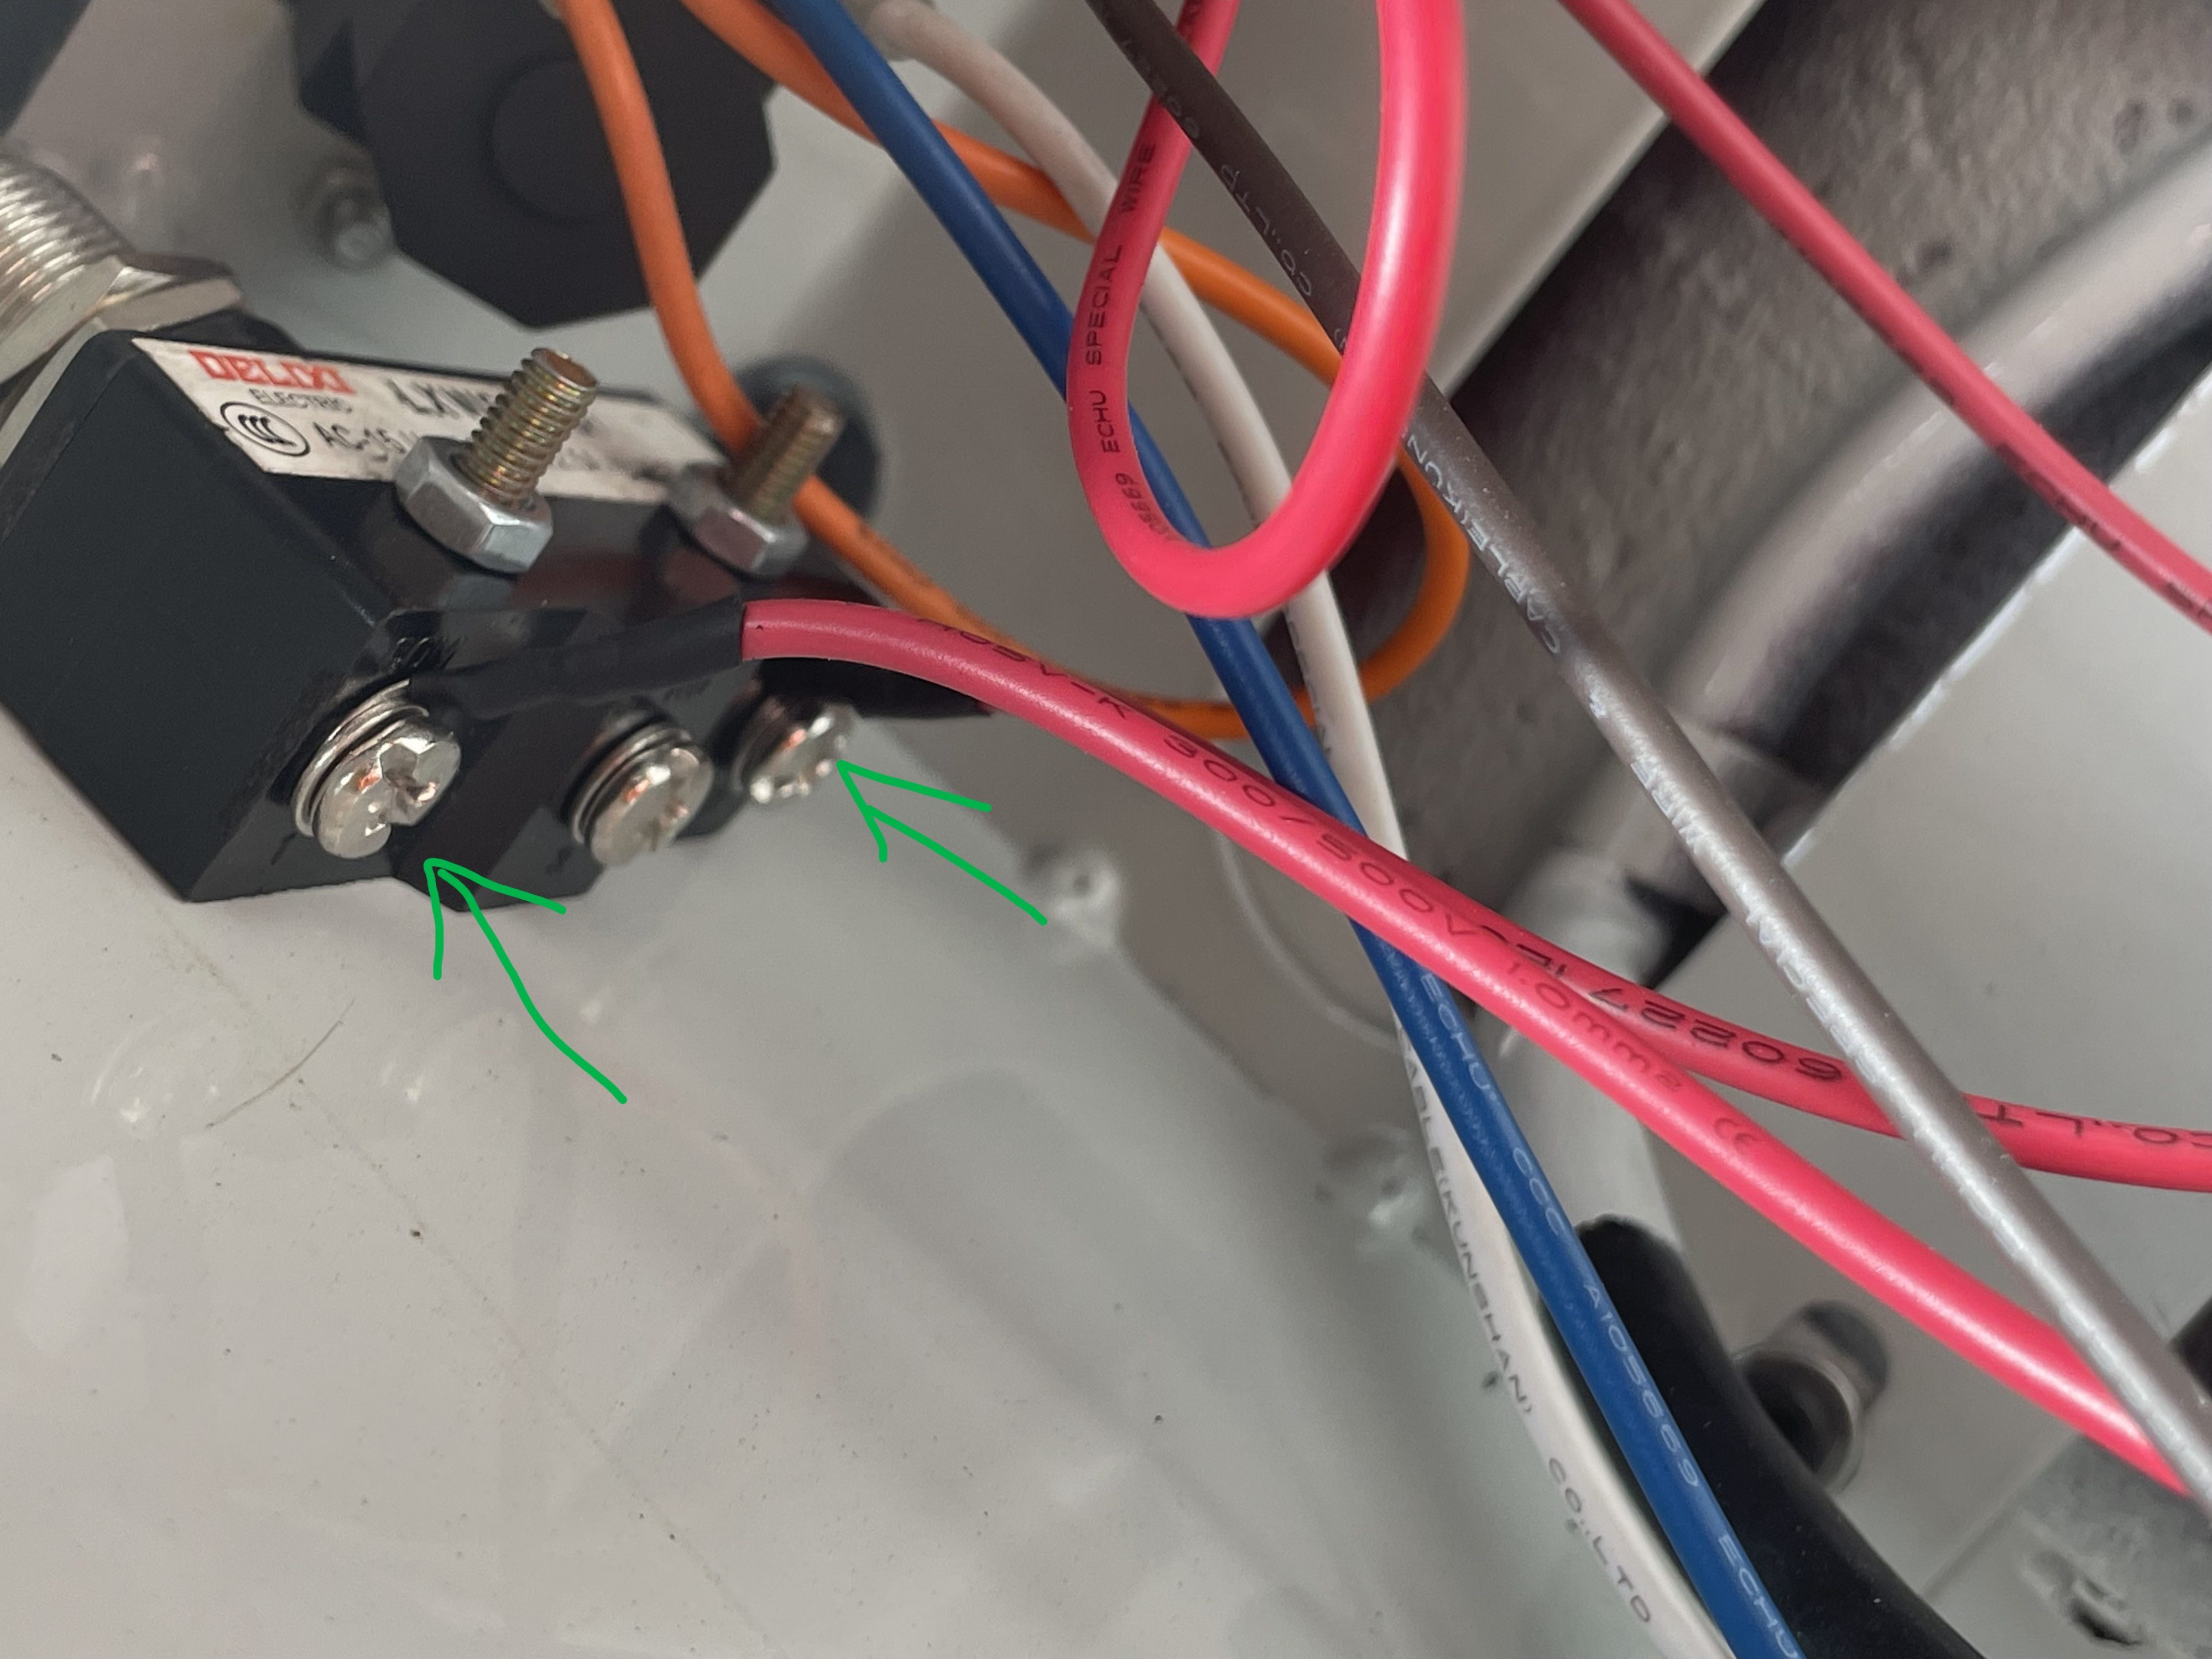
Unscrew both of those. Don’t lose the screws!
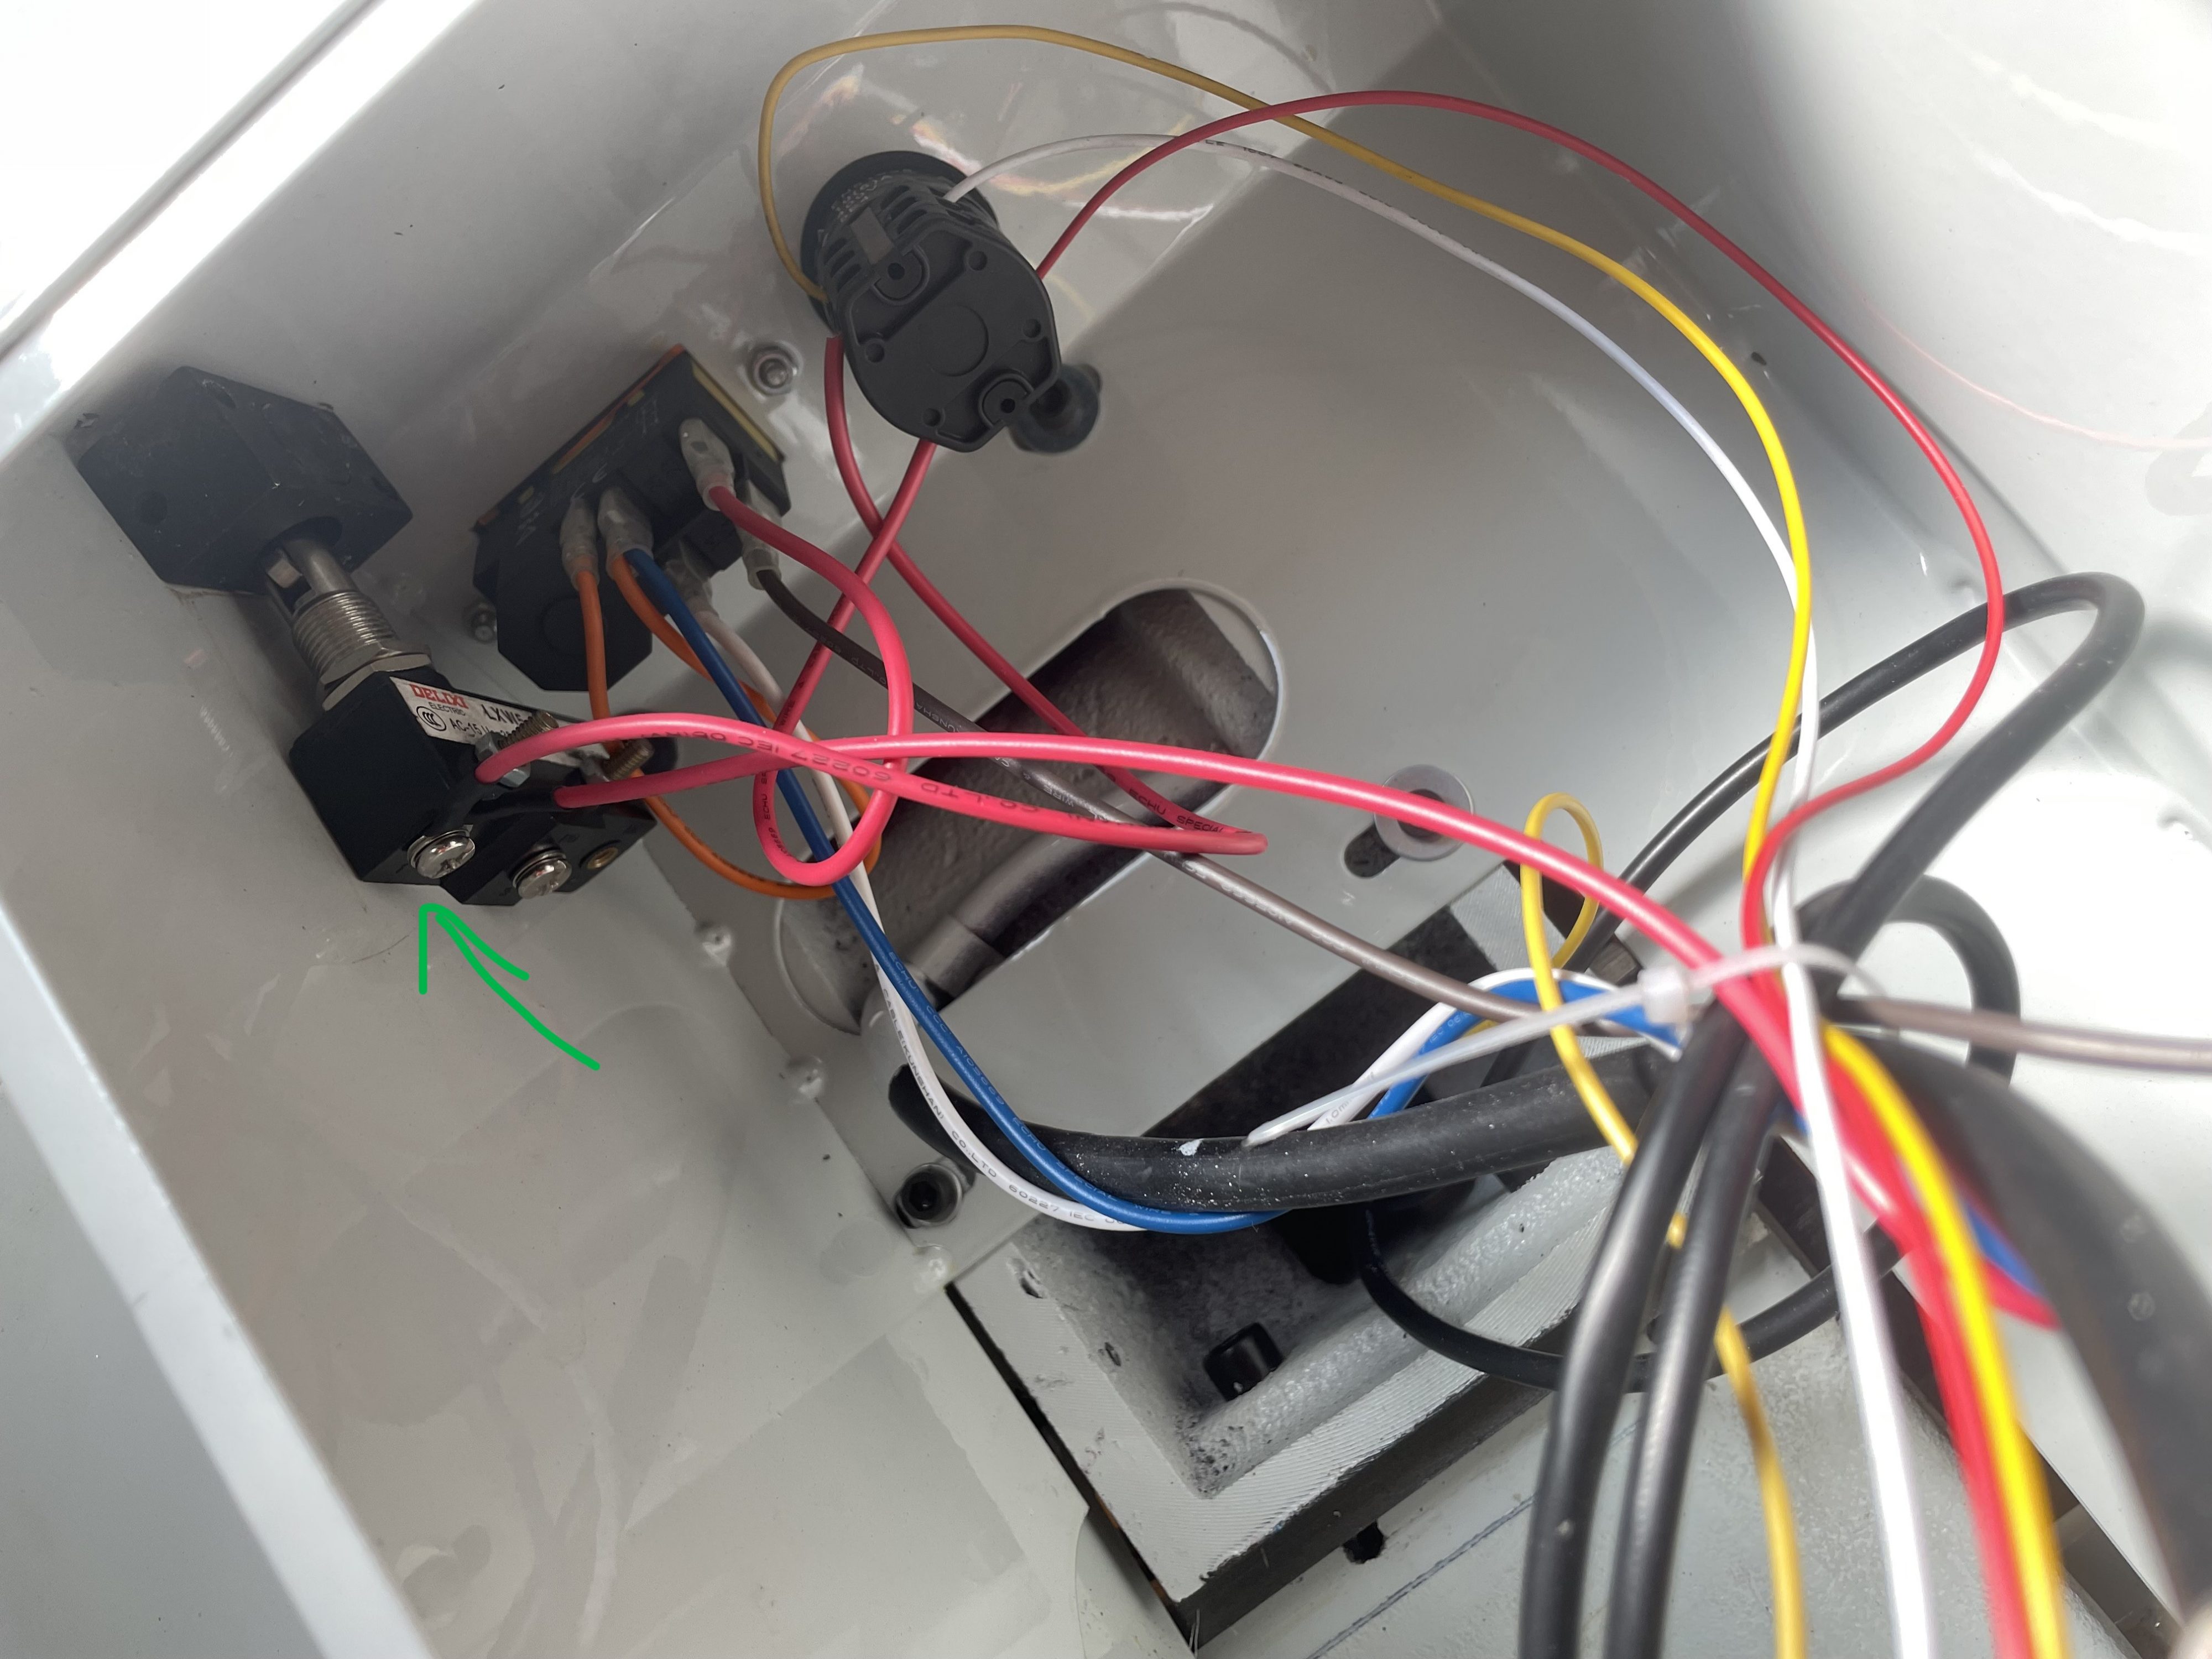
Then screw both wires into the same terminal. It doesn’t matter which terminal, so I just did the one that was easiest to access.
At this point, you can test it to make sure it is working. Just be careful not to touch any wires when you have the power connected!
Step #3: Put it Back Together
That’s pretty much it. Now you can put the cover back on.
The only reason I’m including this as a separate step is to give you an important remind: connect the ground wire!
That should go on the bottom-left screw, between the cover and the lathe chassis.
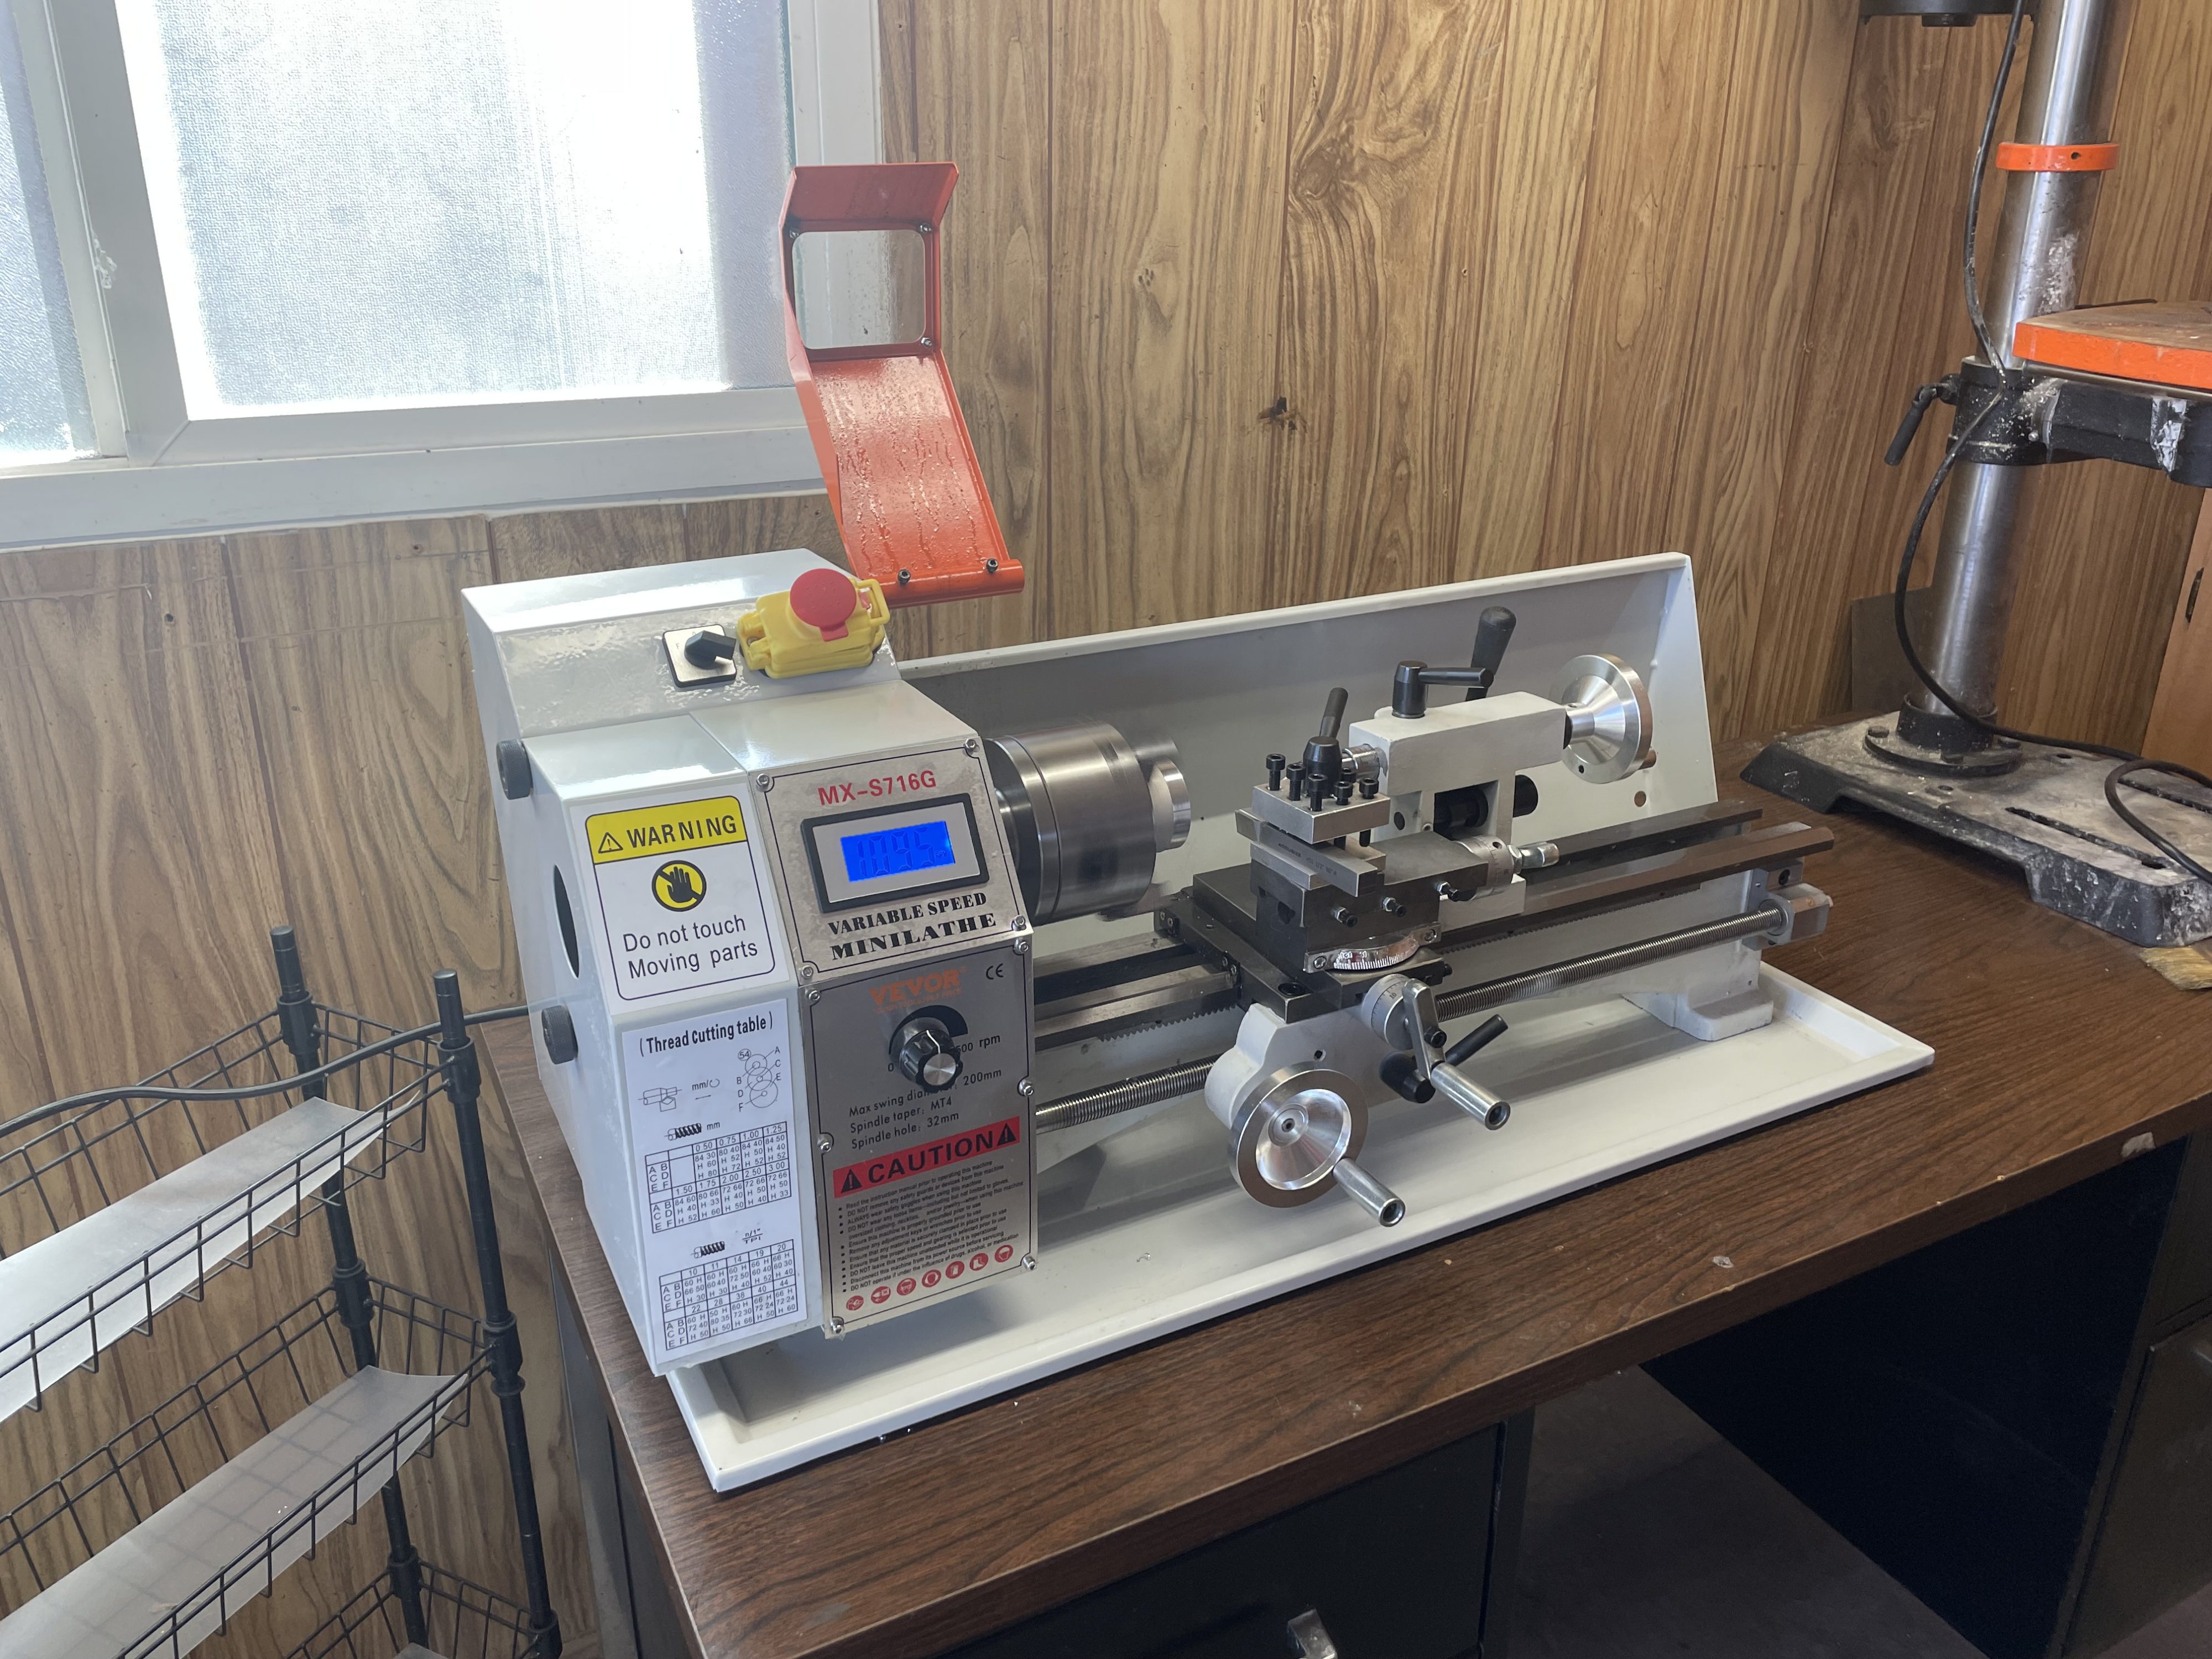
It should now run, no matter what position the chuck shield is in. Woo!
You can take the shield off if you want, but I’m planning to leave mine on for the time being. It will be flipped-up most of the time, but I’d like to have the option to flip it down if I grease up the chuck or something.
I’ll probably be posting a lot more about this lathe, both here and on my YouTube channel, so check back if you’re interested!


Leave a Reply